A Christmas village on a small shelf: plan the footprints
Plan a small Christmas village with three shelf layouts, real miniature dimensions and a paper footprint check before buying buildings or risers.
For a small shelf, begin with one main building, one smaller piece and a clear foreground. Add a second tall building only after you check the usable width, depth and headroom. A short row of pieces with space around them is easier to plan than a crowded collection bought before measuring.
Use each piece’s footprint, not its height, to decide how many will fit. Leave a route for cords and room to reach switches or connectors without dismantling the scene.
Three layouts for a narrow display
A small street: put two pieces next to each other and keep a shallow clear strip in front. This works as a first paper layout when the shelf has more width than depth.
One focal building: choose one taller piece, place a smaller accent beside it and use the remaining space for a modest foreground. This keeps the tallest item visible without a raised platform.
A stepped scene: put one piece on a stable, appropriately rated riser behind a lower piece. Check the extra height and total load. A riser changes visibility; it does not increase the shelf’s depth or its load capacity.
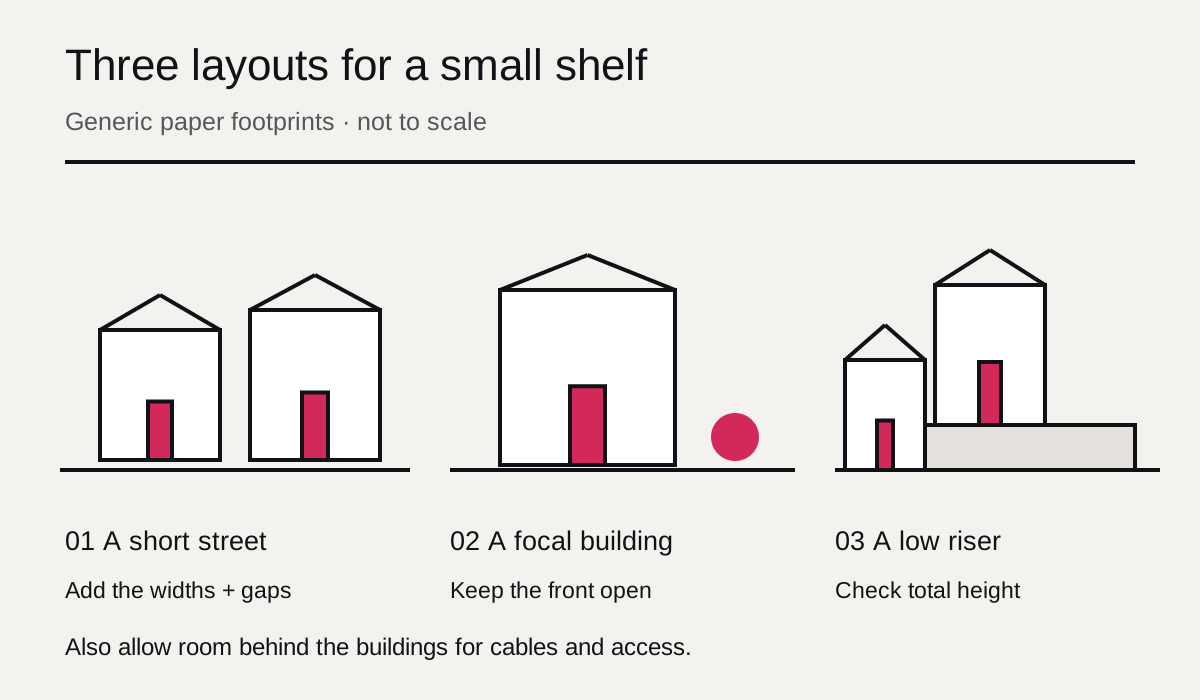
Planning illustrations. Generic shapes do not depict the actual Lemax products.
Check real pieces in width–depth–height order
Manufacturers may list dimensions as height × width × depth. Rewrite them in the order you need for your shelf so you do not mistake a tall building for a wide one.
| Manufacturer example | Width | Depth | Height |
|---|---|---|---|
| Lemax Pat-A-Cake Bakery, 55349 | 5.9 in | 5.1 in | 7.5 in |
| Lemax Churros, 63827 | 4.4 in | 2.8 in | 5.2 in |
These are approximate specifications from the linked manufacturer pages. The bakery lists an included adaptor; Churros is listed as non-electrical. Other pieces may have different lighting requirements, so check each one rather than assuming a shared power setup. We have not purchased or assembled either piece.
Work through an 18-inch shelf example
Suppose your shelf has 18 inches of clear width, 8 inches of clear depth and 10 inches of headroom. This is a hypothetical example, not a recommended shelf size or load rating.
Putting the two documented pieces side by side with a 1-inch gap uses 5.9 + 4.4 + 1 = 11.3 inches of width. Add a chosen 2-inch margin at each end, and the planned width becomes 15.3 inches. That leaves 2.7 inches within the example’s 18-inch width.
The deeper piece is 5.1 inches deep. With an illustrative 1-inch rear space and 1-inch foreground, the depth plan is 7.1 inches. The taller piece is 7.5 inches high, leaving 2.5 inches under the example’s upper shelf. Those gaps are layout choices, not guaranteed electrical or handling clearances.
If you add a 1-inch riser beneath the bakery, the height becomes 8.5 inches. Recheck stability, cords and handling access. A plan that passes the numbers can still be awkward to assemble or remove.
Make a paper footprint test
Draw the shelf’s clear rectangle on paper. Cut separate rectangles for each piece using its outside width and depth, label their heights, and try the layouts above. Mark the space taken by brackets, a front lip or a wall outlet.
Move the pieces on paper before buying more buildings. For a gift, ask where the recipient will display it and whether they already collect a particular village range. A compact accent can be a better match than a larger illuminated building that has no place to stand.
This test checks a proposed arrangement. It does not establish shelf strength, product stability or lighting safety. Verify those separately using the shelf and product instructions.
Buy the missing function, not the whole scene
After laying out the pieces, list what is missing: a suitable support, one smaller accent, a compatible light or nothing at all. A larger riser, backdrop and multiple new buildings are not automatically necessary.
Check the exact item number, current seller, delivered price, lighting parts and return terms. Treat adaptor compatibility as a product-specific question, and do not bury equipment that needs ventilation or access under scenery.
The source links are not active affiliate links. This guide is meant to help you choose a piece with a plausible place to work, whether it is a gift or part of your own display.
Sources & limitations
Product and documentation checks: 2026-10-12. Availability and prices can change. Read the linked sources for the current details.
Original layouts are planning examples, not photos of a built display. Dimensions are approximate manufacturer specifications. No lighting compatibility, shelf load rating, retailer stock or physical fit was tested.