Desk cable management without drilling: check the fit first
Choose a no-drill cable tray by desk thickness, edge access, power-strip size and movement. Compare clamps, clips and ties before buying.
For a desk with an accessible, compatible edge, a clamp-on tray is a useful no-drill option to investigate. Use ties to group the cables and clips to guide the ends you need on top. Those three parts solve different problems; a packet of clips will not support a heavy power strip by itself.
Before shopping, check what is underneath your desk. An apron, drawer, curved edge or frame can prevent a clamp from seating even when the desk’s thickness is inside the advertised range.
Measure four things
- Desktop thickness at the mounting point. Measure the actual edge, including any lip the clamp must cross.
- Clear space beneath that edge. Check where the lower clamp pad will sit and whether hardware prevents full contact.
- Tray space. Allow for the tray’s length, depth and hanging height without obstructing your knees or drawer travel.
- Loaded power-strip envelope. Include plugged-in adapters, sideways plugs, cable exits and space to operate the switch.
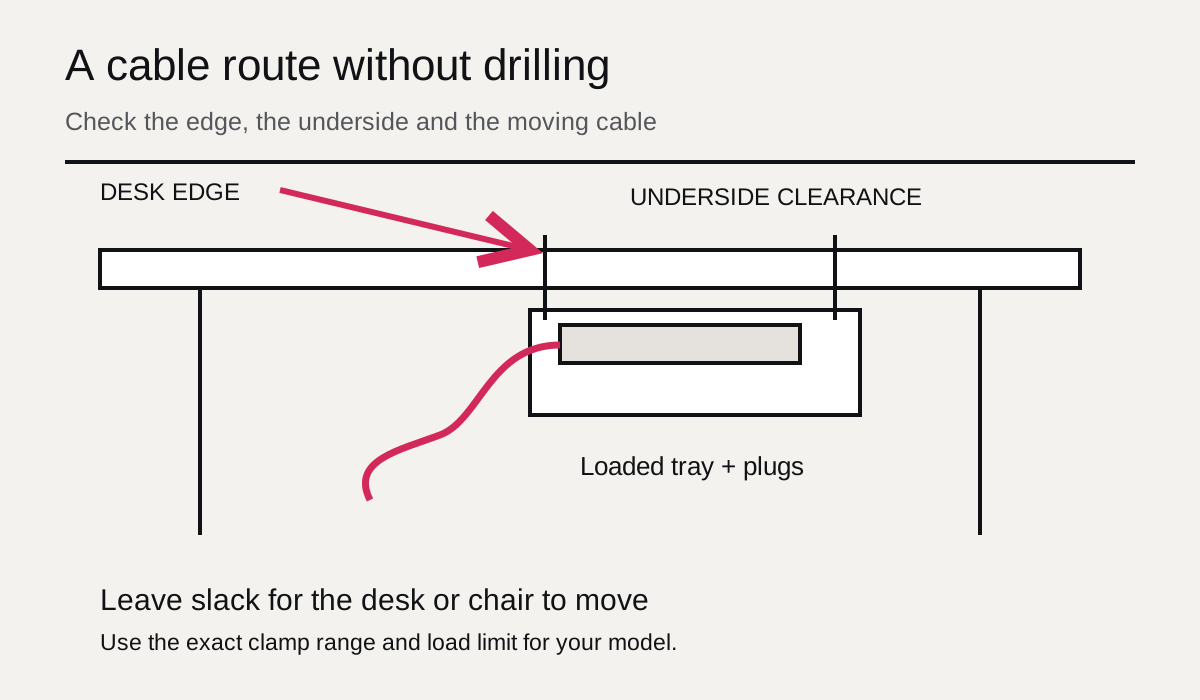
Planning diagram, not a wiring instruction or a tested tray installation.
Measure the loaded strip rather than copying its bare dimensions. A short strip with bulky chargers can occupy more usable tray space than a longer strip with ordinary plugs. Keep heat-producing equipment accessible and follow its ventilation instructions.
Compare attachment methods
| Method | Useful for | Check before choosing |
|---|---|---|
| Clamp-on tray | Supporting and gathering equipment below a compatible desk edge | Thickness range, clamp seating, capacity and hanging clearance |
| Adhesive clips | Guiding individual cable ends | Surface compatibility, cable diameter and removal instructions |
| Reusable ties | Grouping cables that follow the same route | Leave access to connectors and enough slack for movement |
| Sleeve | Covering a bundle along a common route | Bundle size, connector access and branch points |
Adhesive is not a universal substitute for a clamp. Painted or delicate finishes may react differently, and an attachment that stays in place may still leave residue. Follow the adhesive manufacturer’s surface and removal instructions. Do not treat “renter-friendly” marketing as a promise that your particular finish will stay untouched.
Two documented clamp-tray examples
VIVO lists its DESK-AC16F-C fabric-tray series for desktops 0.4–2 inches thick, with an 11-pound capacity. The 16-inch variant’s tray is listed as 15.7 × 5.5 × 5 inches. Those are different checks: compatible desktop thickness does not prove that the complete assembly fits under a drawer.
The DESK-CM6L-B steel-tray series lists a 0.2–2-inch desktop range and 11-pound capacity. Its product page also mentions mounting hardware. Confirm the instructions for the exact configuration you intend to use; do not assume all included hardware has the same purpose.
These are specification examples, not tested winners. We have not verified loaded performance, finish protection or delivery to your address. Compare current manuals and the exact variant before ordering.
Route one bundle at a time
Start by separating cables that move with the desktop from cables connected to fixed equipment. Identify the one route to the wall or floor before putting everything into a sleeve.
For a height-adjustable desk, check the route at the lowest and highest intended positions. A cable that looks tidy when lowered can pull on a connector when raised. Leave a loose section where movement happens, and make sure it cannot snag the frame. Do not raise the desk to test a route you already know is tight.
Keep the most frequently unplugged lead accessible. A charging cable buried inside a tightly tied bundle defeats the point of making the desk easier to use. Label similar connectors before grouping them.
A five-minute buying check
Write down the desk-edge thickness, available underside area, loaded equipment size and weight, and where each cable must exit. Reject a tray if any of those checks conflicts with its specifications.
If you cannot use an edge clamp, look for a freestanding cable-management arrangement rather than forcing an unsuitable attachment. If all you need is to stop one cable end sliding off the desk, a compatible clip may be sufficient.
For another small-space measurement problem, see our under-sink organizer fit guide. The same principle applies: check the usable space and movement before buying a product that merely looks tidy in a photograph.
Sources & limitations
Product and documentation checks: 2026-10-12. Availability and prices can change. Read the linked sources for the current details.
Manufacturer specifications were checked; trays and adhesives were not installed or load-tested by us. No-drill does not mean guaranteed damage-free. Electrical and installation instructions remain product-specific.